Flying My T-Rex 450 into a Palm Tree
January 4, 2008
Well its been a while since my last post, and this is part of what I have been doing since then. Lots of flying. I almost had 80 consecutive flights without a crash, but all of a sudden a palm tree jumped up out of no where! I misjudged my distance from the one and only near by tree. To make a short story even shorter, I smacked into the top of the palm tree with lots of forward speed, and nearly full throttle/pitch.
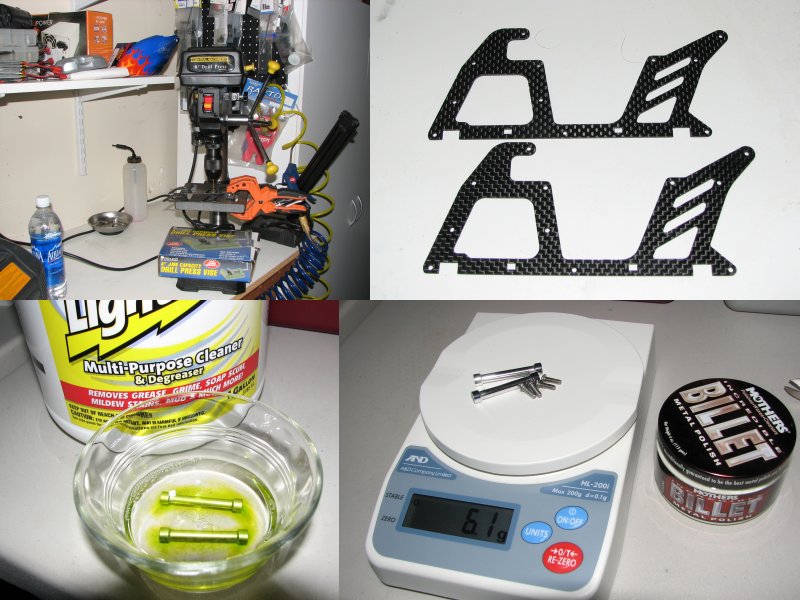
Quite to my surprise when inspecting the heli, the blades were not visibly damaged, and both shafts were perfect (rolled on glass to check)! This crash messed up my frames though, so I bought new frames and decided to reinforce them as best I could. I added two braces in the front where the frame bowed out from the crash, and I used canopy mounts from the Thunder Tiger E-Titan.
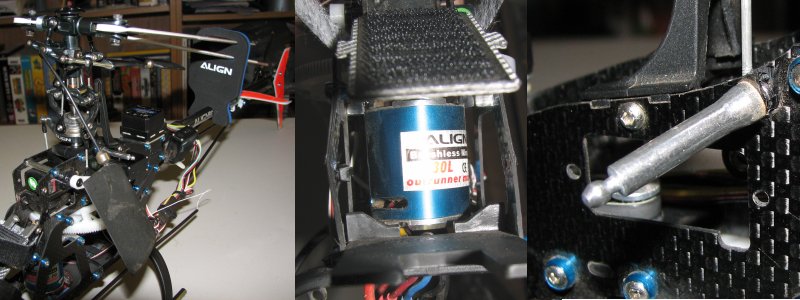
The effort needed to do these modifications was minimal since I had to tear down the heli anyway. After some searching around, I found out that an RC car company, Axial, makes posts that are a nearly perfect fit for my modification. They're 40mm long, and the distance between the frame sides is 39mm. The part number is AXA1316. A little sanding to shorten the posts was all that's needed, and since I didn't want green anodized parts on my heli, I stripped off the green with some Greased Lightning. In less than 10 minutes the green melted off as if it was food coloring. I polished the posts to a nice shiny silver. The added weight was minimal, with the two posts and the four screws weighing in at just over 6 grams.
Using the Thunder Tiger canopy mounts (#PV0816 for aluminum, or #PV0720 for plastic) was trivial. Just ream out the holes in the frames, and install the new mounts. The tube that connects the two mounts is shorter than the distance between the T-Rex frames, and I needed to use five washers to shim it up nice. The mounts have a long threaded part, so they still had lots of threads inside the tube when installed.
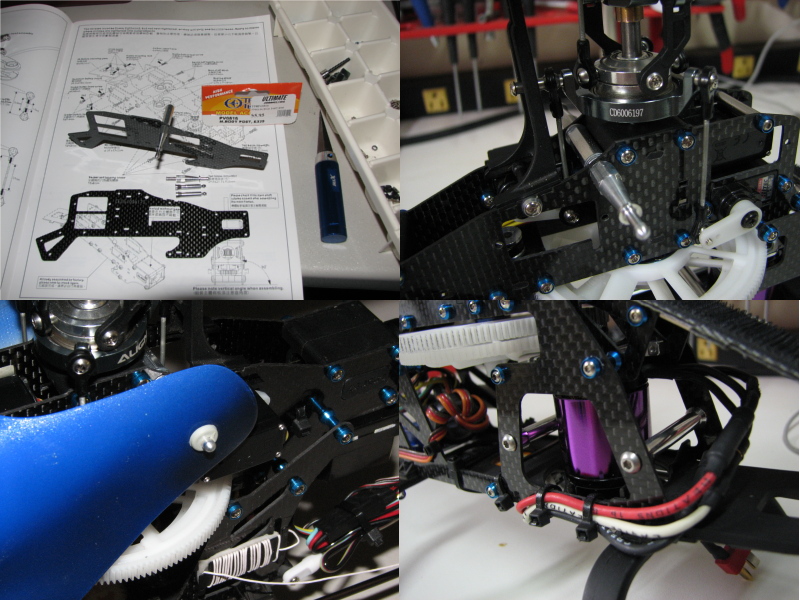
You can also see the installed Axial posts in the above image. I think this will help out a lot in the future since the T-Rex is my "bashing" heli that I use to practice new stuff. While rebuilding the heli, I installed the few remaining aluminum goodies that I was saving for my next crash, checked all bearings and linkages (replaced some) and dropped in a Hacker A20-6XL and a Phoenix 35 that I had laying around. This should give me a little more power for the next time I want to ram into a palm tree :)